| |
|
|
|
| |
This page is
primarily a guide for Internet auction sellers who don't specialize in
cameras, but come across the occasional item in their general buying.
If you have limited knowledge of cameras, it can help you work in a more
informed way with potential buyers . Requests for refunds and potential
negative feedback are minimized if the buyer and seller have a common
understanding of condition. Although the examples shown are Kodak folding
cameras, much of the information is relevant to other types of Kodaks
and Graflex/Graphic and other press and view cameras of this vintage.
This page is written for sellers that know very little about cameras;
here is a similar page for experienced photographers. 
|
|
|
| |
 |
How
to read a lens
...Definitions 
Kodak and Graflex (Graphic) frequently offered cameras with several different
lens and shutter combinations. Many Graphics had Kodak lenses and shutters.
These variations are often of critical interest to the collectors, if
to no one else. Most Kodak lenses are identified on the printed ring that
surrounds the front lens element. Many buyers will be interested in:
- The lens
name, here Anaston
- The maximum
aperture, here f /4.5
- The focal
length, here 105mm
- Whether
the lens is coated, here indicated by the symbol

- The name
of the shutter, here Flash Kodamatic
- Some Kodak
lenses have a serial number, EO8529, on the lens shown below
|
|
|
| |
How
to Evaluate Lens and Shutter Condition
Sellers, carefully
clean your lens before looking for problems and
photographing it for your auction. You can't accurately evaluate the condition
of a dirty lens and shots of dirty lenses make a bad impression on potential
buyers and at a minimum invite unnecessary questions. Most
buyers are also
interested in the condition of lenses and shutter. Potential problems
include:
- Scratches,
typically on the external surfaces of the front and back lens elements.
Examination of these surfaces, after cleaning,
with some magnification (even strong reading glasses), under a bright
light viewing the lens at different angles is the best way to see scratches.
Very fine scratches may have been caused by repeated and inappropriate
cleaning these are usually referred to as "cleaning marks".
Pits or chips usually have been caused by something striking the lens.
|
|
|
| |
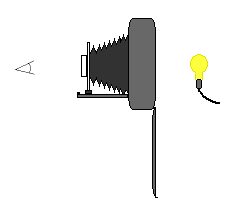
- Other lens
problems are better seen by looking into an illuminated lens using a
light source shown to the right. Put the light source in front of the
lens or behind it, depending on what you are looking for. You should
open the shutter and set the lens to full aperture. Open the aperture
with the small lever that points to numbers like 4.5, 5.6, 8, 11, 16.
The aperture is open when set on the numerically smallest number, as
in the photo above. Set the shutter on T or B to open it. On B, you
must hold the shutter release down.
|
 |
|
|
| |
- Old lenses
sometimes are attacked by fungus. This will tend to appear as
a cloudiness or a frost-like pattern on glass surfaces. This can be
on the exposed surfaces--front or back of lens--on on the inner surfaces.
This is often a fatal problem if it has spread too far and etched the
coating and/or glass.
- Lenses are
usually made from multiple pieces of glass, with some pieces cemented
together. When the adhesive fails, separation occurs. In
some lenses this will appear as cloudiness, generally around the outside
of the glass where the adhesive has failed. In modern, multicoated lenses,
this will generally appear as a reflective area in an otherwise transparent
element. The best way to see this is to move a lens under a fixed light
source; the problem will be very apparent at certain angles; be sure
to look through the lense from both front and back. You
should look for this as you look through the opened lens. The fix for
separation is to dissolve the original cement and recement the elements.
Recementing lense elements takes skill and specialized equipment. Cost
for one lens group runs about $125.
- Scratches,
fungus damage and separation affect value to collectors and photographers,
pretty much in proportion to the seriousness of the flaws.
|

Lens with a fungal infection

A multicoated lens with
serious separation problems
|
|
|
| |
- Many old
Kodaks have lenses that are focused with a rotating front lens element,
with a protruding pin that limits rotation. This rotation is normal
and isn't a fault. Graphics do not have front cell focusing and have
a fixed front lens element, though they have similar kinds of lenses
and shutters.
|
|
|
| |
 |
- Shutters
may be dirty or broken. Most shutters on old Kodaks and Graphics have
to be manually 'cocked' before they will open. Most shutters have a
lever on the top in location
 ,
which, when moved in the direction shown, will cock the shutter. The
shutter release is the lever in location ,
which, when moved in the direction shown, will cock the shutter. The
shutter release is the lever in location  and should be pressed in the direction shown to trip and open the shutter.
These levers may look different or be in slightly different places,
but they generally operate in the same way. Some cameras will have a
body release, usually a button on the top of the camera, that is linked
to the shutter release lever. It is possible that the shutter itself
may work, even if the body release does not.
- While you
cannot check the accuracy of a shutter without special equipment, you
can see if all of the speeds work. By looking into the lens while you
are tripping the shutter, you will see the shutter blades open and close.
As you operate the shutter over its range, you should be able to notice
that as the shutter speed numbers get increasingly smaller, the shutter
stays open increasingly longer. Example: At 25 (1/25th
sec) the shutter should stay open longer than at 50 (1/50th
sec). If you can see a pattern of increasingly longer durations
as you use the lower numbers, this indicates that the shutter is probably
operating correctly, though not necessarily that each speed is accurate.
The shutter to the left has speeds from 1 sec to 1/400th
sec.
- Oil from
the shutter mechanism may have found its way onto the shutter blades
and must be removed or it may foul the lens. Leave this for the auction
winner or a technician, but it should be mentioned to the bidders.
|
|
|
| |
Cleaning
a Lens
Most old cameras
will have accumulated dust and maybe grime. Unless you have experience
with cameras, you may do more harm than good in cleaning other than a
light dusting. A vacuum cleaner with a clean dusting attachment is good.
To evaluate the lens, however, you will need to clean the two external
surfaces and you can do this safely with things you probably have handy.
- With a soft
clean brush, remove as much loose dust as possible. (An
unused cosmetics brush works well)
- Moisten
a small piece of tissue (white, unscented toilet tissue or facial tissue)
with Windex and swab the lens surface. Remove excess moisture with a
dry corner of the tissue. Repeat this operation with new tissue/Windex
until you see no traces of oily film on the lens surface. With folding
cameras cleaning the rear lens element is easy with the front closed
and the back open.
- Never try
to clean a lens with dry tissue.
- After you
have shaken out any dust, brush away any tissue lint with the soft brush
or blow it away with the kind of shringe used to clean out babies ears.
- Unless you
have experience with camera maintenance, it's best not to disassemble
a lens for further cleaning.
|
|
|


