| |
|
|
|
| |
When selling cameras and accessories
by auction, the buyer must rely on the seller's description. Many after-auction
conflicts are based on differing opinions about the condition of equipment.
Buyers can avoid useless returns or the need to haggle by evaluating sellers'
descriptions and asking questions to supplement published information,
knowing what to look for. Sellers can minimize negative feedback and requests
for external arbitration by carefully evaluating equipment condition and
describing it clearly. Lenses and shutters are especially problematic
because, even some experienced photographers may not have had experience
with some kinds of lens and shutter problems. Younger photographers may
not have experience with older kinds of equipment. Here is some help that
was originally written for old Kodaks, but is generally applicable to
most lens and to between-the-lens shutters that are not coupled to film
winding mechanisms. This holds true for most Graphic press, view and Graphic
XL cameras; Graflex reflex cameras have barrel lenses and focal plane
shutters that have very different controls.
Note: While I hope this page
serves an educational function, it also serves a certification function.
Auction sellers, if I refer you to this page for evaluation of lens and
shutter condition and you certify that your lens is free from defects
and that your shutter has certain reliability and accuracy, I consider
that you have reviewed this material and that review is part of our transaction--your
initial description, my questions, this review, and your answers.
This page is
written for sellers that have significant experience with cameras; here
is a similar page for those with less experience. 
|
|
|
| |
How
to Evaluate Lens and Shutter Condition
Sellers, carefully
clean your lens before looking for problems and
photographing it for your auction. You can't accurately evaluate the condition
of a dirty lens and shots of dirty lenses make a bad impression on potential
buyers and at a minimum invite unnecessary questions. You will need a
bright light source and some kind of magnification to reliably evaluate
the condition of lens surfaces. A jeweler's loupe, photographer's loupe
or a common magnifying glass all will work. Buyers can use these same
techniques to examine equipment on arrival to see that it measures up
to sellers' descriptions.
Potential optical
problems include:
- Scratches
on glass surfaces, typically on the external surfaces of the front and
back lens elements. Examination of these surfaces, after careful
cleaning, under a bright light viewing the
lens at different angles is the best way to see scratches. Describe
what you see in your evaluation. Types of conditions:
- Scratches
where both the coating and glass are scratched. Size and position
are important factors to mention. On which lens elements are the
flaws located?
- Coating
problems. Sometimes overambitious cleaning will mar the coating,
but not the glass. Again, size and position are important, but also
the percentage of the surface of the element that is affected.
- Bubbles
in lens elements look dramatic, but have little or no effect on
image results. Bubbles were common in Kodak glass in the '30s-50s.
If a lens passed Kodak quality control it was probably OK.
|
|
|
| |
- Other lens
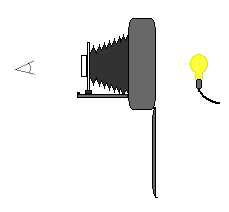
problems are better seen by looking into an illuminated lens using a
light source shown to the right. You should open the shutter and set
the lens to full aperture. Set the shutter on T or B.
|
 |
|
|
| |
- Old lenses
sometimes are attacked by fungus. This will tend to appear as
a cloudiness or a frost-like pattern on glass surfaces. Sometimes it
will have a crystalline appearance. This can be on the exposed surfaces--front
or back of lens--or on the inner surfaces. This is a serious problem
if it has spread too far and etched the coating and/or glass.
- Lenses are
usually made from multiple pieces of glass, with some pieces cemented
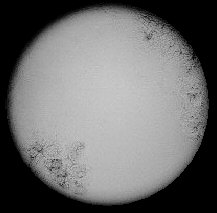
together. When the adhesive fails, separation occurs. In
some lenses this will appear as cloudiness, generally around the perimeter
of the glass where the adhesive has failed. In modern, multicoated lenses,
this will generally appear as a reflective area in an otherwise transparent
element. The best way to see this is to move a lens under a fixed light
source; the problem will be very apparent at certain angles; be sure
check the both front and back lens elements. Look
for for separation by viewing through all of the lens elements, but
also through the ones closest to you toward the interior of the lens
barrel, for example, as the picture to the right is oriented. The damage
shown here looks like two pieces of wet glass held together by surface
tension, but where air pockets have gotten trapped between them.
- Many of
these conditions can be repaired, but only at substantial cost because
complex operations
similar to those used in lens manufacture have to be replicated. Lenses
can be polished and recoated to fix scratches and fungal damage. Separated
elements can be cleaned and relaminated. For the lens to perform at
or near its original specifications, care, expertise and special equipment
are required. This comes at between $125-200 per lens group, so such
repairs are usually only practical for expensive lenses.
- Scratches,
fungus damage and separation affect value to collectors and photographers,
pretty much in proportion to the seriousness of the flaws.
- Effects
of these flaws on lens performance is a subject of active debate. Flaws
near the perimeter of the lens will generally affect performance only
when the lens is set to or near its maximium aperture. Most of these
flaws cause light defraction--a scattering of the light rays--and reduce
contrast. The seriousness of this varies pretty directly with the amount
of the surface affected. Protecting the lens from light other than that
reflected by the field of view can reduce refraction, so using effective
hoods and multicoated filters is especially useful with flawed lenses.
 |

Lens with a
fungal infection

A multicoated
lens with serious separation problems

Recementing
operation at S. K. Grimes
|
|
|
| |
- Many old
Kodaks cameras have lenses that are focused with a rotating front lens
element, with a protruding pin that limits rotation. This rotation is
normal and isn't a fault. Lenses for Graphics or other press or view
cameras generally do not have front cell focusing and have a fixed front
lens element, though they have similar kinds of lenses and shutters.
|
|
|
| |
|

- Shutters
may be dirty or broken. Most shutters on old Kodaks and Graphics have
to be manually 'cocked' before they will open. Most shutters have a
lever on the top in location
 ,
which, when moved in the direction shown, will cock the shutter; Graphic
XL lenses have the cocking lever on the bottom. The shutter release
on most Kodaks and Graphics is the lever in location ,
which, when moved in the direction shown, will cock the shutter; Graphic
XL lenses have the cocking lever on the bottom. The shutter release
on most Kodaks and Graphics is the lever in location  and should be pressed in the direction shown to trip and open the shutter.
These levers may look different or be in slightly different places,
but they generally operate in the same way. Some cameras will have a
body release, usually a button on the top of the camera, that is linked
to the shutter release lever. It is possible that the shutter itself
may work, even if the body release does not.
- While you
cannot check the accuracy of a shutter without special equipment, you
can see if all of the speeds work. By looking into the lens while you
are tripping the shutter, you will see the shutter blades open and close.
As you operate the shutter over its range, you should be able to notice
that as the shutter speeds get longer, the shutter stays open increasingly
longer. If you can see a pattern of increasingly longer durations the
shutter is probably operating correctly, though not necessarily that
each speed is accurate.
- Oil from
the shutter mechanism may have found its way onto the shutter blades
and must be removed or it may foul the lens. Leave this for the auction
winner or a technician, but it should be mentioned to the bidders.
|
|
|
| |
Cleaning
a Lens
Most old cameras
will have accumulated dust and maybe grime. Unless you have experience
with cameras, you may do more harm than good in cleaning other than a
light dusting. A vacuum cleaner with a clean dusting attachment is good.
To evaluate the lens, however, you will need to clean the exposed external
surfaces. This at least means the front of the front lens group and the
back of the back lens group. In many cases, with lenses on press and view
cameras, the groups can easily be removed from the shutter body so that
the rear of the front group and the front of the rear group can also be
cleaned.
- With a soft
clean brush, remove as much loose dust as possible. (An
unused cosmetics brush works well)
- Cleaning
with liquids should be a rinsing not a scouring operation. You are using
the liquid to dissolve oils on the surface of the glass. Rubbing is
abrasive and can easily scratch the relatively soft coatings on early
lenses.† Moisten a small piece
of tissue (white, unscented toilet tissue or facial tissue) or optical
tissue with lens cleaner or Windex and swab the lens surface. Let the
cleaner dissolve oils on the surface, then absorb the excess moisture
with a dry corner of the tissue. Repeat this operation with new tissue/lens
cleaner until you see no traces of oily film on the lens surface. Then
wipe it dry with a piece of optical tissue, which has less lint than
facial or toilet tissue. .A lens with accumulated oil/grease may require
6-8 repetitions. With folding cameras cleaning the rear lens element
is easy with the front closed and the back open.
- Never try
to clean a lens with dry tissue.
- After you
have shaken out any dust, brush away any tissue lint with the soft brush
or blow it away with the kind of syringe used to clean out babies ears.
An unused syringe, please.
|
|
|


